8 min to read
GitHub Pages First Page
Let's create the first page

This is the second article in the series. Previous article
Prerequisite
Create your account on GitHub.com
It’s straightforward and similar to creating an account in any other service. You will need to provide your e-mail, username, and password. Next, you will need to validate your e-mail.
Once done you can continue reading this article, if you want to practice at the same time.
GitHub Repo
First, we create a GitHub Repository. As usual, you have a few options here:
- To be page URL username.github.io* - create repository with such name.
*username is your login name on GitHub - To be page URL username.github.io/reponame* - create repository with name reponame.
- You can also configure your domain which you bought from the domain provider. However, I will describe this in a separate article
Steps
Go to your profile icon in GitHub main page
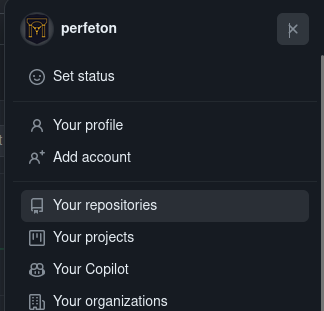 Click new to create a repository
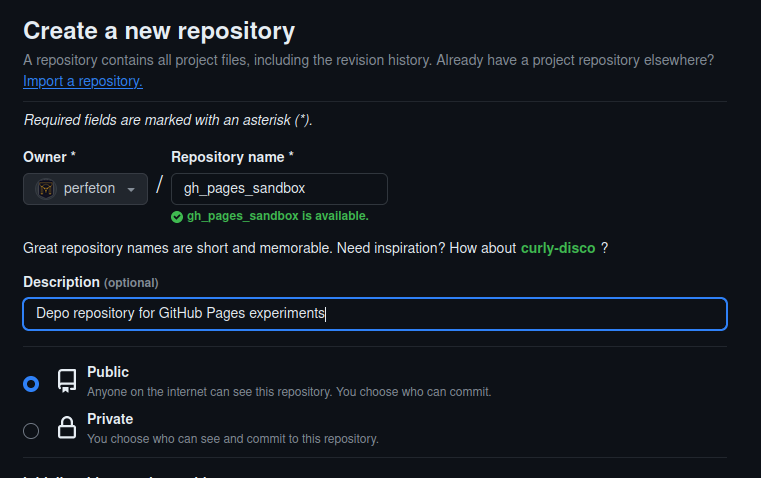
 In the new window provide:
- Repository name as described above
- Description
- Set the repository as Public. This is mandatory to enable the hosting page on GitHub Pages.
On free accounts, it is not possible to use GitHub Pages from a private repository.
 Your repository is now created and is empty. In an empty repository, GitHub provides commands on how to create a repo and README.md file. We will follow these instructions and add a few additional steps.
Git Settings
It is time now to configure git and clone repository to your computers’ hard drive.
I’m assuming that you have already installed Git. If not, you can install it in Linux Debian-based distributions (Debian, Ubuntu, Linux Mint) using the following commands.
Note: Linux Mint is my operating system and favorite Linux distribution so I will be providing how to make the setup of various tools for this system. For now, I will be providing links to configuration on different operating systems.
sudo apt update
sudo apt upgrade
sudo apt-get install git
These commands do the following operations:
- updates available packages list
- install available updates for packages already installed
- install the Git package if not already installed. If you finish you can check if Git has been already installed, by checking its version
git --version
#output
git version 2.34.1
If you have as output from the console Git version, this means you have successfully installed Git.
For other operating systems:
Navigate to Git downloads page
Global Settings
Before you begin working with Git it is good to do initial setup.
Set your name or nickname.
git config --global user.name "Your Nick Name or Name"Set your e-mail.
git config --global user.email "yourname@yourdomain.com"If you don’t want to make your e-mail address available for public access you can set fake e-mail which is provided in your account settings:
https://github.com/settings/emails
Set default branch name.
The default Git branch name is “master”. The default branch name for GitHub is “main”. So it is good to call your main branch “main”. This setting works for Git versions starting from 2.28.
If you have an older version of git you will have to change the default branch name every time you make a new repository.
git config --global init.defaultBranch mainSet default editor for commits etc. Git needs the setup of a text editor for commit names, conflict resolution, etc. The default one is Vim. Vim is the console text editor for Git. However, Vim is not very user-friendly, especially for new persons. In Linux, you can use another popular console text editor Nano. Nano is much more user-friendly. On Linux Mint you can use Xed which GUI text editor.
git config --global core.editor "xed"
Now you can verify your settings:
git config --global --list
#output
user.email=yourname@yourdomain.com
user.name=Name
core.editor=xed
init.defaultbranch=main
Create a repository and push it to server
After the configuration of Git, it’s high time to go back to the main topic of this article.
Let’s open the console.\
On Linux Mint can use the shortcut CTRL+SHIFT+T, or open from the Start Menu by pressing the Windows button on the keyboard and starting typing “Terminal”.
On Windows, we can start typing “CMD” in the main search window near the Start Button (with Windows logo).
- Create a README.md file.
README.md file is the file with a basic description of the project in the repository. It is important in every software repository, especially public ones. This file is written in Markdown Language. Markdown has a very simple syntax and I use it a lot, not only for repository summaries but also for personal notes and backbone for this blog.
We can do it using the console command
echoor using your favorite text editor. This is a Linux command which displays text on the screen. But the output of this method can be redirected to the file by the>operator. Single operator overrides contents of the file. The double operator adds another line in a text file.echo "# GitHub Pages Sandbox #" >> README.md echo "Repository for Sandbox used in series of articles about GitHub Pages" >> README.md - Create a new repository and add files
We can create a new repository in the current folder by command
git initNext, we add current changes to the index - so-called staged changesgit addNext, we commit changes. In other words, we create a new commit containing the current contents of the indexgit commitgit init git add README.md git commit -m "Initial commit"Now we can see the changes using the
git logcommandgit log #output commit 96c326e7575c36042a509271037f87e187899c11 (HEAD -> main) Author: Perfeton <155832822+perfeton@users.noreply.github.com> Date: Fri Feb 16 12:31:07 2024 +0100 Initial commitIn the results, we can see the commit number and commit description. We can also see that it is the latest commit and the active branch is “main” (marked as HEAD). If you haven’t set the default branch name to “main” you can do it now by command below. You can omit this step if you prefer the default git branch name.
git branch -M main - Push changes to server
Now it’s time to publish changes on GitHub. We do it by two following commands.
The first one defines the remote server and repository name. The second one pushes changes to the server. The branch on the server is called origin main. Attribute-uconnects the local branch with the remote branch.git remote add origin git@github.com:username/reponame.git git push -u origin main
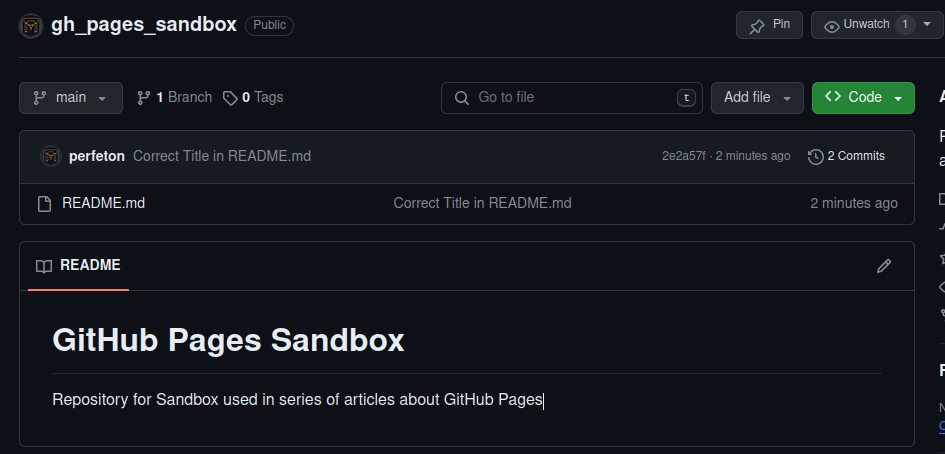
Now it’s time to check the results. Navigate to your repo on GitHub
https://github.com/username/reponame
You should see similar results:
NOTE: If you run into troubles check the GitHub documentation about authentication during pushing changes to GitHub. I’m thinking about writing an article about it because it is sometimes confusing for new users. So stay tuned.
First Page
To host a page on GitHub Pages we simply have to create as a minimum starting HTML file.
For all pages, the first-page file is called index.html. So let’s do it similarly as before. I’m not explaining commands again. I will not follow also HTML syntax for now.
One new command git add -all adds all changes to an index. Since we have connected branches previously we don’t need to use -u in git push.
echo "Hello World" >> index.html
git add -all
git commit -m "Add index.html file"
git push
Publishing
Now everything is ready. The only left actions is to change repository settings.
Go to repository settings (not profile Settings). You can do it by clicking the Settings button on top of the repository and by navigating to the following URL:
https://github.com/username/reponame/settings
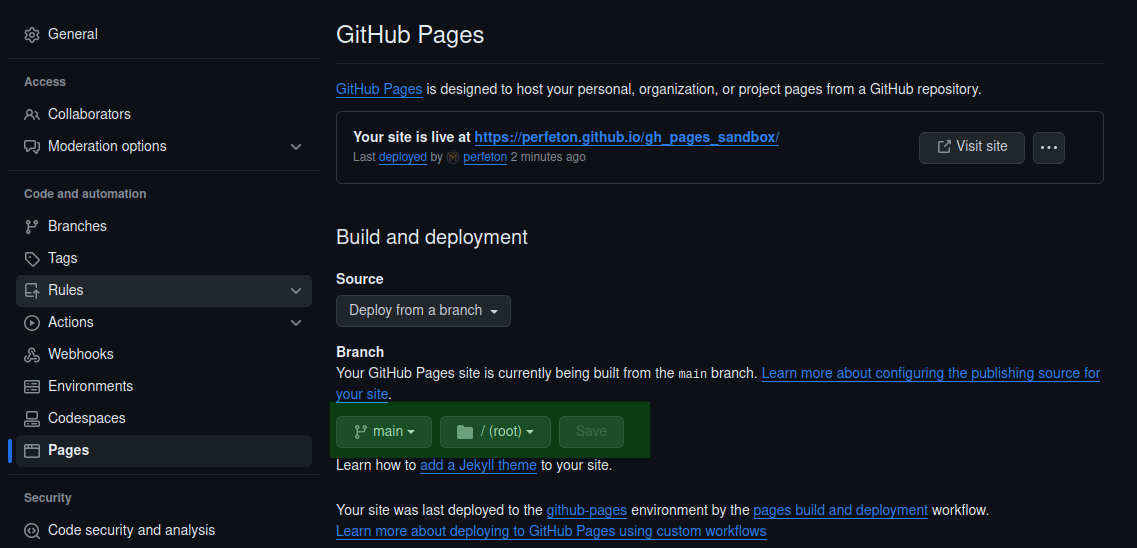
Navigate to the tab “Pages” on the left and change the branch and folder from which the page will be published - marked in green. In the end, click “Save”.
You need to wait a few minutes to let the deploy task finish. Once done you can visit your page by clicking the “Visit Site” button on the top.
Summary
In this article, we have learned how to set up your first repository and publish a GitHub page from it.
The code is avialable on Perfeton GitHub:
https://github.com/perfeton/gh_pages_sandbox
The site is published under the URL:
https://perfeton.github.io/gh_pages_sandbox/
NOTE: The Published version will be evolving as we progress with the tutorial. Each version will be kept in a separate branch.
Congratulations You have published your first page on GitHub pages.


Comments